Home › Guides › How to Paint a Model Tank
How to Paint a Model Tank, Step by Step
BuildAnArmy is reader-supported. When you buy through our Amazon links we may earn a commission, at no extra cost to you. How this works.
Painting is where a grey plastic tank turns into a vehicle that looks like it rolled out of a 1943 photograph. The good news is that tank painting follows a fixed order. Each step prepares the surface for the next one, and if you follow the sequence, even simple brush work gives a convincing result. This guide walks through that order from bare plastic to final matte coat.
The order of work at a glance
Almost every tank modeler uses some version of this sequence. You can skip steps, but try not to reorder them, because each one depends on the layer underneath.
- Prepare and prime
- Base coat
- Camouflage
- Gloss coat
- Decals
- Wash
- Dry-brushing and details
- Chipping
- Tracks and wheels
- Matte coat, then dust and mud
Why does the gloss coat come before decals and the wash? Because both behave best on a smooth surface. A matte surface is microscopically rough. Decals trap air on it and washes soak into it everywhere instead of flowing into the recesses. The matte coat comes back at the end to kill the shine.
Step 1: Prepare and prime
Before any paint touches the model, wash the assembled parts in warm water with a drop of dish soap, rinse and let them dry. Mold release agents and the oils from your fingers stop paint from sticking. Check for seams, glue smears and sanding scratches now. Primer will show every one of them, which is part of its job.
Most builders paint a tank in sub-assemblies: lower hull with road wheels, upper hull, turret, and tracks separately. Tape or blu-tack each part to a handle such as an old paint bottle or a wooden stick so you never have to hold the model itself.
Spray primer in two or three light passes from about 20 cm away rather than one wet coat. A heavy coat fills fine detail like weld seams and casting texture. Light grey is the universal choice. Black primer is useful if you plan to build up the color in layers from dark to light, which gives natural shadows in the recesses.

Tamiya Fine Surface Primer Spray, Light Gray
A fine lacquer-based primer in a spray can. It goes on thin enough to keep weld beads and casting texture visible, and the light grey shows up flaws so you can fix them before the color goes on. Use it outdoors or in a well-ventilated space.
Check price on AmazonStep 2: The base coat
The base coat is the main color of the vehicle. For a German tank built from 1943 onward, that is dark yellow (Dunkelgelb). For an American tank, olive drab. For a Soviet tank, a dark green. For early-war German armor, dark grey.
With a brush, thin acrylic paint with a little water or thinner until it flows like whole milk, and apply two or three thin coats. Let each coat dry fully. One thick coat leaves brush marks and pools in corners. Work in one direction on large flat plates, and follow the line of the panel rather than scrubbing back and forth.
With an airbrush, the base coat is quick and very even. Many modelers add depth here with a simple trick: spray the base color over the whole tank, then mix in a little white or light sand and spray that only on the upper surfaces and the centers of panels. The tank now looks lit from above before any weathering. See our airbrush basics guide if you are new to the tool.
Tip: Paint the inside faces of the road wheels, the lower hull sides and the areas behind the sprockets in the base color before you mount the wheels and tracks. You will not reach them later.
Step 3: Camouflage, by brush or airbrush
Camouflage is where history matters most. From February 1943, German tanks left the factory in dark yellow, and crews were issued olive green and red-brown paint to apply in the field. Because units applied it themselves, patterns varied widely: soft bands, hard-edged patches, thin squiggles, spots. That variety is good news for modelers. There is no single "correct" pattern, only patterns that match the period and the theater. Look at period photos of the specific vehicle type before you start.
By brush
Brush camouflage looks best as hard-edged patches or bands. Outline each patch with a fine brush, then fill it in with a larger one. Use two thin coats rather than one thick one, especially with red-brown over dark yellow, which tends to cover poorly. Hard edges are historically accurate for many vehicles, so do not feel you are cutting a corner.
By airbrush
An airbrush gives the soft, sprayed edge seen on many German vehicles. Lower the pressure, thin the paint a bit more than usual and get close to the surface. Practice the pattern on a piece of card first. For hard edges, you can mask with blu-tack "sausages" rolled out and pressed along the pattern lines, which gives a slightly soft but defined edge.
Allied tanks are simpler. Most American tanks in Europe were plain olive drab, sometimes with field-applied mud or black disruptive patterns. British tanks in North Africa used several desert schemes, and later in Europe a plain green. If you want to practice painting without the stress of camouflage, a Sherman is a great canvas.

Tamiya Panther Ausf.D
The Panther Ausf.D was the first Panther version to see combat, at Kursk in the summer of 1943, when dark yellow with field-applied green and brown was the standard. That makes it an ideal subject for practicing a three-color German scheme. Check period photos and the kit's painting guide for pattern ideas.
Check price on AmazonSteps 4 and 5: Gloss coat and decals
Once the camouflage is fully dry, spray or brush a clear gloss varnish over the areas that will get decals, or over the whole model if you plan a wash everywhere. Let it cure, then apply the decals: national crosses or stars, turret numbers and unit markings. A setting solution helps them sink over hatches and weld seams. Decals have their own techniques and pitfalls, so we cover them in detail in how to apply decals without silvering.
Step 6: The wash
A wash is a very thin, dark paint that flows into recesses, around bolts and along panel edges. It creates shadows and separates the details. On a gloss surface it flows by itself. Touch a loaded brush to the base of a bolt or the edge of a hatch, and capillary action pulls it along. This is called a pin wash.
A black wash works well on grey and green vehicles. On dark yellow, a dark brown often looks more natural. Wipe away any excess on flat surfaces with a brush slightly dampened with the matching thinner. If you use an enamel wash over acrylic paint, the gloss coat underneath protects the paint from the thinner.

Tamiya Panel Line Accent Color, Black
A pre-thinned enamel wash with a brush in the cap, made for exactly this job. Touch it to recesses and around details and it flows into place. Clean up stray marks with enamel thinner once it has set for a few minutes.
Check price on AmazonStep 7: Dry-brushing and details
Dry-brushing does the opposite of a wash: it catches the raised edges. Take a lighter shade of the base color, load an old flat brush, then wipe almost all of the paint off on a paper towel. Lightly flick the brush across raised details such as hatch hinges, bolt heads, weld beads and the edges of armor plates. Build it up slowly. A heavy hand makes the tank look chalky.
Now paint the small details with a fine brush:
- Tools on the hull: wooden handles in a mid or dark brown, metal heads in dark grey or gunmetal.
- Tow cables: dark steel, then rusty brown on the outside.
- Lights: silver inside the lens, or a clear color if the kit has clear parts.
- Machine gun barrels: gunmetal or black with a graphite or steel dry-brush.
- Exhaust pipes: a rusty orange-brown base, darkened with soot at the outlet.
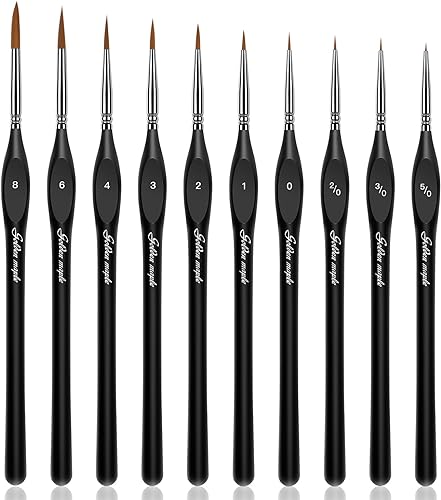
Golden Maple Detail Paint Brush Set, 10 Brushes

Vallejo WWII German Infantry Paint Set
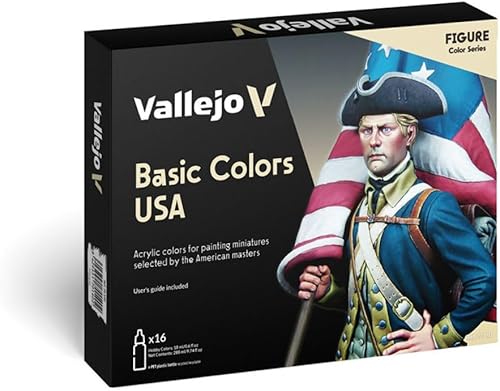
Vallejo Basic USA Colors Paint Set, 16 Bottles
Step 8: Chipping
Chips show where paint has worn off the metal. On a real tank they appear where crews climbed, where tools rubbed and on edges that hit branches and walls. They are rare on large flat surfaces.
- Sponge chipping: tear off a small piece of packing foam, dab it in dark brown, blot most of it off, then dab it gently onto edges and hatches. It gives random, natural-looking chips quickly.
- Brush chipping: paint tiny irregular shapes with a fine brush. It is slower but gives you full control.
- Two-tone chips: paint a chip in a lighter shade of the base color, then a smaller dark brown chip inside it. The light one reads as a scratch through the top layer; the dark one as bare metal.
Use dark brown or a dark rust color rather than black or silver. Bare steel on a tank in the field oxidizes quickly, and black looks too stark at scale.
Step 9: Tracks and wheels
Steel tracks were never bright silver. Paint them a dark rusty brown or a dark grey-brown, give them a wash, then dry-brush only the contact faces and guide horns with steel or graphite. That polished-metal shine on the parts that touch the ground is what makes tracks look heavy and real.
Road wheels with rubber tires need a very dark grey, not pure black, which looks flat and toy-like. Many modelers use a circle template or simply rotate the wheel against a steady brush. Rubber-block tracks, used on many Shermans, follow the same rule: dark grey rubber, metal end connectors.
Tip: Test your paint on the hidden inner face of vinyl tracks first. Some paints stay tacky on vinyl or crack when the track flexes, and it is better to find out where nobody will see it.
Step 10: Matte coat, then dust and mud
A matte (flat) clear varnish unifies the different sheens of paint, gloss, decals and wash, and hides decal film edges. Spray it lightly over the whole model. Then add the final layer of earth: dust on the lower hull, mud on the running gear, and soot at the exhausts, using pigments or weathering powders. Pigments go on after the varnish because varnish sprayed over them tends to make them disappear. Our weathering guide covers these effects in depth.

Tamiya Weathering Master Set A: Sand, Light Sand, Mud
Three earth tones in a makeup-style case with a sponge and brush applicator. You rub the powder onto the lower hull and running gear, and it builds up dust and mud with very little mess. Good for beginners who want results without mixing pigments.
Check price on AmazonQuick answers
Can I paint a model tank without an airbrush?
Yes. Brush painting with thin acrylic coats gives excellent results, especially for single-color schemes and hard-edged camouflage. An airbrush mainly helps with soft-edged camouflage and smooth color transitions.
Should I paint before or after assembly?
Assemble the main sub-assemblies first, then paint. Keep the wheels, tracks and small tools separate so you can paint them easily. Paint any interior parts before they are closed up.
Why does my wash stain the whole surface?
The surface was probably matte. Washes soak into matte paint. Apply a gloss coat first, then the wash will flow into recesses and wipe off flat areas cleanly.
What color should German tanks be?
It depends on the date. Dark grey was standard early in the war; from early 1943, dark yellow became the base color, often with green and red-brown camouflage. Desert vehicles had their own schemes.
Do I really need a matte coat?
Not always, but it is the easiest way to make the model look like painted steel rather than plastic. It also hides decal edges and protects the paint while you handle the model.
Keep reading
 Techniques
How to Apply Model Decals Without Silvering
Make decals look painted on: gloss coat, soaking, Micro Set, Micro Sol and Mark Fit setting solutions, fixing silvering and wrinkles, and sealing the…
Read guide Techniques
Weathering for Beginners: Washes, Dust, Rust and Mud
Weathering basics: panel line washes, filters, dry-brushing, pigments, rust, mud and exhaust soot, plus how much is right for tanks, aircraft and…
Read guide Techniques
Airbrush Basics for Model Builders
Airbrush basics for modelers: brush vs spray can vs airbrush, single vs dual action, compressors, thinning, cleaning, safety and your first practice…
Read guide