Home › Guides › Airbrush Basics
Airbrush Basics for Model Builders
BuildAnArmy is reader-supported. When you buy through our Amazon links we may earn a commission, at no extra cost to you. How this works.
An airbrush is a small spray gun that lets you lay down thin, even coats of paint and soft camouflage edges that a brush cannot easily match. It is the most common upgrade for modelers after their first few kits. It also has a learning curve, and most of the frustration comes from a handful of predictable issues. This guide explains how airbrushes work, what you need, and how to get good results from your first session.
Brush, spray can or airbrush?
You do not need an airbrush to build great models. Each method has a place:
| Method | Best for | Limitations |
|---|---|---|
| Brush | Details, figures, small parts, hard-edged camouflage, weathering | Hard to get perfectly even coats on large surfaces; no soft edges |
| Spray can (rattle can) | Primer, single-color base coats, clear coats | Limited color choice; no control over fine lines; wasteful on small parts |
| Airbrush | Smooth base coats, soft camouflage, fades, highlights, varnishes | Cost, setup, cleaning, learning curve |
Many modelers use all three: a spray can for primer, an airbrush for base coats and camouflage, and brushes for details and weathering.

Tamiya Fine Surface Primer Spray, Light Gray
Even airbrush owners often prime from a spray can, because it is fast and gives a reliable, thin coat. This lacquer-based primer sprays fine enough to keep detail sharp. Use it outdoors or with good ventilation.
Check price on AmazonHow an airbrush works
Compressed air flows through the airbrush and past a fine nozzle. A tapered needle sits inside the nozzle. When you pull the needle back, it opens a tiny gap, and the airflow draws paint through it and atomizes it into a fine mist.
Single action vs dual action
- Single action: pressing the trigger releases air. The amount of paint is set separately by a knob or adjuster. Simple and easy to learn, but you cannot change the paint flow while spraying.
- Dual action: pressing the trigger down releases air; pulling it back releases paint. You control both at once with one finger. This takes practice, but it lets you vary line width and opacity on the fly, which is why most modelers use dual action.
Gravity feed vs siphon feed
Gravity feed airbrushes have a small cup on top. Paint falls into the airbrush, which works at lower pressure and uses small amounts of paint efficiently. Siphon feed models draw paint from a jar underneath. They suit large areas and quick color changes. Gravity feed is the most common choice for scale models.
Nozzle size
Nozzle sizes typically range from about 0.2 mm to 0.5 mm. A 0.3 mm nozzle is a good all-round choice for models. Smaller nozzles allow finer lines but clog more easily. Larger nozzles handle thicker paints like primer and varnish.
The compressor
An airbrush needs a steady supply of air. Canned air works but is expensive and loses pressure as it cools. A small hobby compressor is the standard choice. Features to look for:
- Pressure regulator with gauge: lets you set and read the pressure.
- Moisture trap: stops water droplets from spitting through the airbrush.
- Air tank: smooths out pulses from the motor and lets the compressor rest.
- Auto shut-off: the motor stops when you are not spraying, which is quieter and reduces wear.
Typical working pressures for hobby acrylics fall somewhere around 15 to 25 psi for general coverage, and lower for fine detail work. Every paint and airbrush combination is a little different, so start in that range and adjust.

Master Airbrush Cool Runner II Airbrush Kit with Compressor
A kit that bundles an airbrush setup with a compressor, so you can start spraying without matching separate parts. It is a popular entry point for modelers. Check the listing for exactly which airbrushes and accessories are included.
Check price on AmazonThinning paint
Thinning is the single biggest factor in airbrushing success. Paint straight from most bottles is too thick to atomize well. The classic rule of thumb is to thin it to the consistency of milk.
- Airbrush-ready paints, such as Vallejo Model Air, are designed to spray with little or no thinning. A few drops of thinner often help, especially for fine lines.
- Standard acrylics usually need significant thinning, often somewhere between equal parts paint and thinner to a bit more thinner than paint. Follow the manufacturer's guidance.
- Lacquers and enamels use their own solvent thinners and spray very smoothly, but need much better ventilation.
Use the thinner made for your paint. Water can thin some acrylics but often leads to poor adhesion and drying problems. Mix in the cup or in a separate container, stir well, and test on card before spraying the model.
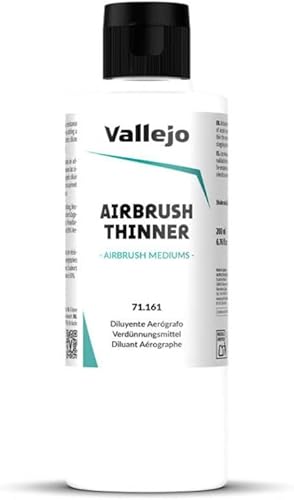
Vallejo Airbrush Thinner, 200 ml

Vallejo Surface Primer, Black, 60 ml
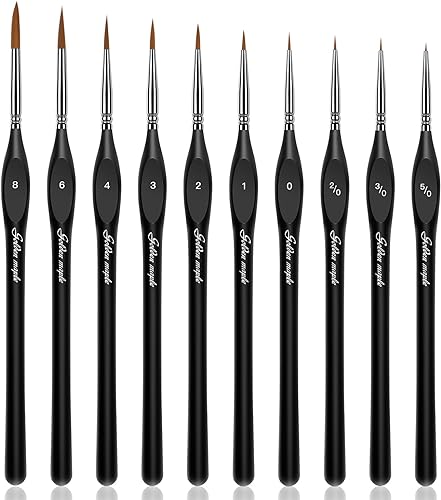
Golden Maple Detail Paint Brush Set, 10 Brushes
Tip: Add a drop of airbrush flow improver or retarder if you get dry tip, where paint dries on the needle tip and the spray becomes spotty.

Vallejo Model Air WWII Allied Colors, 16 Bottles
A set of Vallejo Model Air paints covering common WWII Allied colors. Model Air is formulated for airbrushing, so it needs little or no thinning, which removes one of the biggest variables while you learn. It also covers the olive drab and greens you need for a first Sherman.
Check price on AmazonMasking for camouflage and canopies
An airbrush sprays wherever you point it, so masking becomes part of the job. Three methods cover most model work:
- Masking tape: low-tack hobby tape gives crisp, hard edges. Use it for aircraft canopy frames, straight demarcation lines on aircraft undersides and stripes. Burnish the edge down with a toothpick so paint cannot creep under it.
- Blu-tack or putty rolls: rolled into thin sausages and pressed onto the surface, they give a slightly soft but defined edge, close to the look of many field-applied German camouflage patterns.
- Liquid mask: a latex-type fluid you brush on and peel off later. Useful for odd shapes and small clear parts.
Spray at a shallow angle away from the mask edge, not into it, and remove masks once the paint is dry to the touch rather than days later.
Troubleshooting common problems
| Problem | Likely cause | Fix |
|---|---|---|
| Spitting or splatter | Paint too thick, dried paint on needle tip, or water in the line | Thin more, wipe the needle tip, check the moisture trap |
| Spidering (paint runs in thin lines) | Too much paint, too close, or paint too thin | Move back, reduce flow, thicken slightly |
| Grainy, rough finish | Paint drying before it hits the surface | Move closer, lower pressure, thin a bit more |
| No paint comes out | Clogged nozzle or dried paint | Clean the nozzle and needle |
| Bubbles in the paint cup | Loose nozzle or air leak at the front | Tighten the nozzle; check seals |
Cleaning
Most airbrush problems trace back to cleaning. Dried paint in the nozzle causes spitting and clogs.
- Between colors: empty the cup, add a little water or thinner, swirl with a brush, and spray it through until it runs clear. Repeat with airbrush cleaner.
- At the end of a session: do the same, then remove the needle carefully and wipe it with a cloth dampened with cleaner. Clean the cup and nozzle area with a soft brush.
- Deep cleaning: occasionally disassemble the airbrush according to its manual and clean every part. Handle the nozzle and needle with great care: they are tiny and easy to damage.
Never force the needle forward into the nozzle. It can split the nozzle. Never use pointed metal tools inside the nozzle. Use airbrush lubricant on the needle after cleaning to keep the trigger smooth.
Safety and ventilation
Airbrushing creates a fine mist of paint particles that hang in the air. Even water-based acrylics should not be breathed in.
- Ventilation: a spray booth with a fan that vents outside is ideal. At minimum, work near an open window with a fan blowing air out.
- Respirator: wear a mask rated for paint particles and, for solvent paints, organic vapors. A dust mask is not enough for lacquers and enamels.
- Eye protection: back-spray and cleaning can splash solvent.
- Fire safety: many thinners and lacquers are flammable. Keep them away from heat and open flames.
- Children and pets: keep them out of the room while spraying and while overspray settles.
Your first exercises
Practice on paper or card before touching a model. These exercises build trigger control quickly:
- Dots: hold the airbrush still and make small dots of paint. Try to get them all the same size.
- Lines: draw straight lines across the paper. Practice thick and thin by moving closer and further away.
- Dagger strokes: start a line wide and pull away as you move, so it tapers to a point.
- Fades: spray a solid color that gradually fades to nothing. This is the basis of shading and highlights.
- Fill a shape: draw a square and fill it evenly with paint.
Then move to old kits, plastic spoons or spare parts. A primer coat on a spoon is a good test of thinning and pressure. For a first real model, try a single-color base coat on a tank or a simple aircraft underside.
When you are ready to spray a camouflage scheme, see our step-by-step tank painting guide.
Quick answers
Is an airbrush worth it for a beginner?
If you plan to build more than a few kits, yes. It makes base coats and camouflage much easier. But build one or two kits with brushes first to learn the basics of painting.
Can I use any paint in an airbrush?
Most hobby paints can be airbrushed if properly thinned. Airbrush-specific paints are easier because they are pre-thinned.
What pressure should I use?
Somewhere around 15 to 25 psi is common for general work with acrylics, lower for fine detail. Test on card and adjust.
How often should I clean my airbrush?
Flush it between every color and clean it thoroughly at the end of every session. Dried paint is the main cause of airbrush problems.
Do I need a spray booth?
A spray booth with extraction is the safest option. If you do not have one, at least spray near an open window with a fan pushing air outside and wear a suitable respirator.
Keep reading
 Techniques
How to Paint a Model Tank, Step by Step
The order of work for painting a model tank: primer, base coat, camouflage by brush or airbrush, decals, wash, dry-brushing, chipping, tracks and…
Read guide Techniques
How to Apply Model Decals Without Silvering
Make decals look painted on: gloss coat, soaking, Micro Set, Micro Sol and Mark Fit setting solutions, fixing silvering and wrinkles, and sealing the…
Read guide Techniques
Weathering for Beginners: Washes, Dust, Rust and Mud
Weathering basics: panel line washes, filters, dry-brushing, pigments, rust, mud and exhaust soot, plus how much is right for tanks, aircraft and…
Read guide